GIS Editor Lesson 5: Adding Labels
Adding Labels
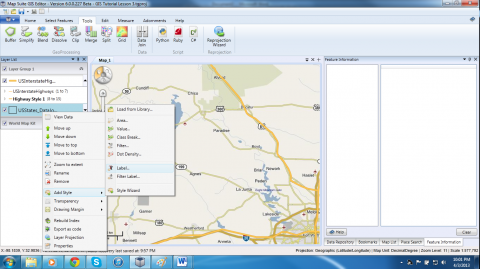
Adding labels to your map is very similar to adding styles. In our project we are going to want to add labels that show the sales data for each state. There are two ways to add a label style. First, by right clicking the layer and selecting “Add Style” then clicking “Label”. Secondly, you can click “Add Style” In the ribbon at the top then select the “New style” then click “Add Style”.
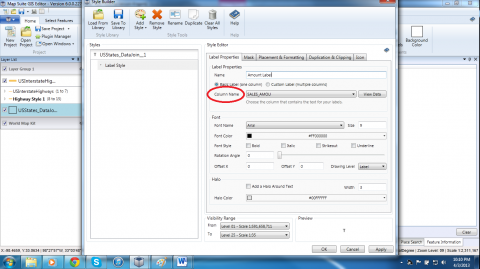
The “Styler” will now appear on screen. As you can see, the properties are different, when creating a label you have the options to change font, colors, and other text properties. To create a label though you must select which column the label is coming from.
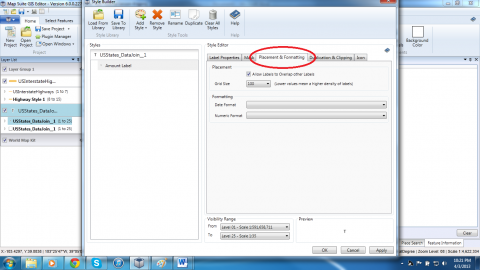
In our project we want to display the sales amount for each state dependent on our data that we joined with our layer earlier. Under label properties locate the drop down list that displays the columns in our layer. Select the column of “SALES_AMOU”. Apply the label, as you can see the Sales amount labels are visible. If you wanted to you could set it visible at different zoom level like the one we discussed in Lesson 4. One problem with our current label is that it is not formatted. To format our label to currency we need to reopen our “Styler”. Now find the tab “Placement & Formatting”.
Under the Numeric formatting option select currency, and apply the style. Now the data shows up in currency. Add the final additions as you like such as BOLD, visibility range, etc.
Save your project and in the next lesson we will begin to sort, query, and select data for greater functionality.
Continue to:
Viewing, Querying and Selecting Data
Or return to the index of all lessons.


